Sunday, December 30, 2012

Migrating from Alchemy to FlasCC - Compiling C/C++ to SWC


New year, new tools! The updated new version of Alchemy, the C/C++ to AS3 compiler - FlasCC was released some time ago. Many things have been changed. These two tools - Alchemy and FlasCC have very different APIs. However, if you have some experience with the old Alchemy, migrating from it to FlasCC is not hard.

In this post I will share my experience of migrating from Alchemy to FlasCC. I ported the very classic Alchemy example to FlasCC - Ralph Hauwert's Alchemy lookup-table effects. I will use that example to show you how to compile C/C++ code to SWC, how to use FlasCC to manipulate screen buffers, as well as the changes of the APIs.

The installation of FlasCC has been greatly simplified. You don't need to install Cygwin separately like Alchemy because the new FlasCC tool is already integrated with Cygwin. First, you have to get the FlasCC tools at
http://gaming.adobe.com/technologies/flascc/.
Unzip the package to somewhere (mine is "D:\FlasCC_1.0.0"), click "run.bat", then you will open the Cygwin window.

Let compile the sample first:

cd 05_SWC
make FLASCC=/cygdrive/d/FlasCC_1.0.0/sdk FLEX=/cygdrive/d/Program\ Files/FlashDevelop/Tools/flexsdk
This sample is a very simple and good start. You should try to read the source code and the official notes:
http://www.adobe.com/devnet-docs/flascc/docs/samples.html#T5

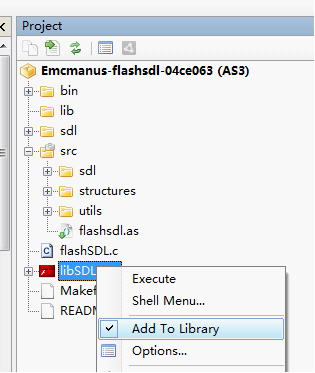
To create a SWC from some C/C++ functions, we need to write some wrapper code (as3api.cpp) to expose the functions to AS3.
In Alchemy, it will be something in the C/C++'s main() function like this:
int main()
{
AS3_Val initializeScreenDiffuseBufferMethod = AS3_Function(NULL, initializeScreenDiffuseBuffer);
AS3_Val rasterizeMethod = AS3_Function(NULL, rasterize);
AS3_Val setupLookupTablesMethod = AS3_Function(NULL, setupLookupTables);
AS3_Val initializeDiffuseBufferMethod = AS3_Function(NULL, initializeDiffuseBuffer);
AS3_Val result = AS3_Object("initializeScreenDiffuseBuffer: AS3ValType, rasterize:AS3ValType,setupLookupTables:AS3ValType,initializeDiffuseBuffer:AS3ValType"
,initializeScreenDiffuseBufferMethod, rasterizeMethod,setupLookupTablesMethod,initializeDiffuseBufferMethod);
AS3_Release( initializeScreenDiffuseBufferMethod );
AS3_Release( rasterizeMethod );
AS3_Release( setupLookupTablesMethod );
AS3_Release( initializeDiffuseBufferMethod );
AS3_LibInit( result );
return 0;
} 
While in FlasCC, it will be some declarations and wrapper functions outside the main function like this:
void rasterize_AS3() __attribute__((used,
annotate("as3sig:public function rasterize_AS3():void"),
annotate("as3package:FlasCCTest.lookupeffect")));

void rasterize_AS3()
{
rasterize();
}

void setupLookupTables_AS3() __attribute__((used,
annotate("as3sig:public function setupLookupTables_AS3():void"),
annotate("as3package:FlasCCTest.lookupeffect")));

void setupLookupTables_AS3()
{
setupLookupTables();
}
And the main function in FlasCC:
int main()
{
AS3_GoAsync();
}

The basic framework for using C/C++ to manipulate screen buffers:
1. Pass the texture's pixel data as ByteArray to C/C++ array.
2. Process the textures in C/C++.
3. Retrieve the screen buffer array (as bytearray) to flash and use a bitmap to render it.
The best way to pass bytearray between C/C++ and AS3 is to use pointers and C machine's RAM.

Please read the full source code of my example for details.

To pass parameters from AS3 to C/C++, and return the pointer of the array tBuffer (the screen buffer) in Alchemy:
AS3_Val initializeScreenDiffuseBuffer(void* self, AS3_Val args)
{
AS3_ArrayValue(args, "IntType, IntType", &resX, &resY);
tBuffer = malloc( resX * resY * sizeof(int) );
return AS3_Ptr(tBuffer);
}
In FlasCC:
int* initializeScreenDiffuseBuffer(int resX, int  resY)
{
tBuffer = (int*)malloc( resX * resY * sizeof(int) );
return tBuffer;//&(tBuffer[0]);//return the pointer to the screen buffer
}

void initializeScreenDiffuseBuffer_AS3() __attribute__((used,
annotate("as3sig:public function initializeScreenDiffuseBuffer_AS3(resX0:int,resY0:int):uint"),
annotate("as3package:FlasCCTest.lookupeffect")));

void initializeScreenDiffuseBuffer_AS3()
{
int* result;
//copy the AS3 resolution variables resX0, resY0 (parameters of the swc function initializeScreenDiffuseBuffer_AS3) 
//to C variables resX, resY in lookupeffect.c
AS3_GetScalarFromVar(resX,resX0);
AS3_GetScalarFromVar(resY,resY0);
//get the pointer of the screen buffer
result = initializeScreenDiffuseBuffer(resX,resY);
// return the result (using an AS3 return rather than a C/C++ return)
AS3_Return(result);
}

Now let's see some differences of the AS3 APIs:
To initialize the C/C++ SWC Lib in Alchemy:
cLibInit = new CLibInit();
alcLookupLib = cLibInit.init();
In FlasCC:
CModule.startAsync(this);
To call the SWC functions:
Alchemy:
alcLookupLib.setupLookupTables();
alcDiffuseBitmapPointer = alcLookupLib.initializeScreenDiffuseBuffer(IMAGE_WIDTH,IMAGE_HEIGHT);
FlasCC:
setupLookupTables_AS3();
alcDiffuseBitmapPointer = initializeScreenDiffuseBuffer_AS3(IMAGE_WIDTH, IMAGE_HEIGHT); 
To use domain memory - the C machine's RAM (http://www.adobe.com/devnet-docs/flascc/docs/apidocs/com/adobe/flascc/CModule.html#ram):
Alchemy:
var ns : Namespace = new Namespace( "cmodule.lookupeffect");
alchemyMemory = (ns::gstate).ds;
alchemyMemory.position = alcDiffusePointer;
alchemyMemory.writeBytes(ba,0,ba.length);

alchemyMemory.position = alcDiffuseBitmapPointer;
screenDiffuseBitmapData.setPixels(screenDiffuseBitmapData.rect, alchemyMemory);
FlasCC:
CModule.writeBytes(alcDiffusePointer, ba.length, ba);
CModule.readBytes(alcDiffuseBitmapPointer, 512 * 512 * 4, ba);
or
CModule.ram.position = alcDiffuseBitmapPointer;
screenDiffuseBitmapData.setPixels(screenDiffuseBitmapData.rect, CModule.ram);

The source code:
https://flaswf.googlecode.com/svn/trunk/flaswfblog/Tutorials/FlasCC_SWC

Links:
http://www.adobe.com/devnet-docs/flascc/docs/Reference.html
http://unitzeroone.com/blog/2009/04/06/more-play-with-alchemy-lookup-table-effects/
http://blog.debit.nl/2009/03/using-bytearrays-in-actionscript-and-alchemy/

Wednesday, December 26, 2012

Bengine Race - Full Source Code of the Game and the Engine Released!

Here is the full source code for the game Bengine Race:
https://flaswf.googlecode.com/svn/trunk/Games/BengineRace

This release includes the C source code of the voxel engine - Bengine and the AS3 source code of the experimental game - Bengine Race.

You need Alchemy V0.5 (the "outdated" one, not FlasCC) to compile the C source code files to the swc.
You can find my backup of Alchemy Tools here:
https://docs.google.com/folder/d/0B5V2PrQ8xX_EN2NCWHkySGlMclE/edit
Or try the Alchemy Repack for Win32:
http://www.covergraph.com/blog/?p=367

Bengine is still under active development. This release is actually a very old version of Bengine. Since there is no schedule for an "official" release, I decided to share this early version first.

Sunday, December 23, 2012

Use HxSL/Stage3D to Create 2D Filters/Shaders

Update on 2014/01/04:
Many things changed since the original post was published. Now HaXe is 3.0 and HXSL reaches 2.0. So here is the updated source code of the example for HaXe 3 and HXSL 2:
https://flaswf.googlecode.com/svn/trunk/flaswfblog/Tutorials/HxSL2DShader/HaXe3HXSL2/
====================

Maybe you know how to use Pixel Bender in your Flash project to create some custom filters. Alternatively, with the new Stage3D API introduced in Flash 11, we can write 2D filters running with GPU. Here is the example:


The idea is simple: draw a plane using two triangles, upload the images you want to process as textures and do all the magic in your fragment shaders. I recommended you to try HxSL, an advanced shader language which has similar grammar to the Pixel Bender language. The above example - Poster Effect is ported from the Pixel Bender filter with only a few modifications of the original Pixel Bender filter code.

The full source code of the above example (HaXe/HxSL):
https://flaswf.googlecode.com/svn/trunk/flaswfblog/Tutorials/HxSL2DShader
The source code of the Poster Shader in Pixel Bender Language:
http://www.adobe.com/cfusion/exchange/index.cfm?event=extensionDetail&loc=en_us&extid=2400022

Links:
Announcing HxSL:
http://ncannasse.fr/blog/announcing_hxsl
Using Flash 3D API:
http://haxe.org/doc/advanced/flash3d
HxSL API:
http://haxe.org/manual/hxsl

GIMP as Pixel Editor

Some notes and tips for using GIMP (2.8) as a Pixel Editor:

1. The Grid: View->Show Grid, Image->Configure Grid (Spacing 16x16)
2. The brush: Tools->Paint Tools->Pencil(N)/Eraser(Shift+E)
Windows->Dockable Dialogs->Tool Options->Brush->Pixel&Size->1.0
3. Preview: View->New View, View->Zoom
4. Palettes from images:
Windows->Dockable Dialogs->Palettes->Palettes Menu->Import Palette->
Select Source->Image(Must be an image already opened in GIMP)

Links:
http://www.gimp.org/
http://www.eglug.org/gimpixel
http://karnakgames.com/wp/2010/10/gimp-for-pixel-art-shortcuts-setup-and-tips/
http://www.youtube.com/playlist?list=PLC6BCB8E64F315574&feature=plcp
http://www.blendernation.com/2014/11/03/learn-ow-to-create-pixel-art-in-blender/
Pixel Editors:
http://www.piskelapp.com/
https://github.com/juliandescottes/piskel
http://www.aseprite.org/
https://github.com/aseprite/

Saturday, September 29, 2012

An Introduction to Flash SDL

Emcmanus's Flash SDL (Simple DirectMedia Layer) using Alchemy V0.5 is very useful for porting C/C++ & SDL based games to Flash. Although Alchemy 2 (FlasCC) is coming soon, and it will have much better support for SDL, Emcmanus's simple Flash SDL library with Alchemy V0.5 just works fine for me now. So I think this simple tutorial for Flash SDL can still be helpful for some people.

1. Flash SDL Installation
You should correctly installed Alchemy V0.5 first. Then goto https://github.com/emcmanus/flashsdl, download the repository zip, it should be "emcmanus-flashsdl-04ce063.zip". Unzip, and
Copy "sdl/SDL.l.bc" to your Alchemy's lib directory, e.g., "D:\alchemy-cygwin-v0.5a\usr\local\lib",
(or within Cygwin "cp sdl/SDL.l.bc $ALCHEMY_HOME/usr/local/lib/")
Copy all header files in "sdl/include" to your Alchemy's include directory, e.g., "D:\alchemy-cygwin-v0.5a\usr\local\include"
(create this folder by yourself if it does exists, or within Cygwin "cp sdl/include/*.h $ALCHEMY_HOME/usr/local/include/")

Now let's test the sample project.
Open Cygwin Terminal, build the swc lib for our project:

cd /cygdrive/f/alchemy/emcmanus-flashsdl-04ce063/
source /cygdrive/d/alchemy-cygwin-v0.5a/alchemy-setup
alc-on  
gcc flashSDL.c -DFLASH -Isdl -lSDL -swc -O3 -o libSDL.swc
Run FlashDevelop and create a new AS3 project in the "emcmanus-flashsdl-04ce063" folder, set "flashsdl.as" as the document class, and add "libSDL.swc" to Library.


Finally build & test the project, you should see a black screen with SDL's mouse icon:


Let see the author's comments for porting your SDL application to FlashSDL:
"Porting your SDL application to FlashSDL
Perhaps this is best understood by example. Examine ./flashsdl.c. Most immediately you will have to refactor your C application's main loop to run iteratively in the tick() method, assuming you end up using the application scaffolding in ./src/.
Make sure you've properly built and installed FlashSDL by building the test application. Then try running your application's ./configure.
Once you've successfully compiled, try linking the resuling SWC with the AS3 side of your application (which should be built on ./src/).
Other Tips
You have to set the color depth of your application to 32 Bits per pixel (in your call to SDL_SetVideoMode)."

Basically, the .as files in "./src/" folder is used to fetch the SDL's pixel buffer and display this buffer using a Flash bitmap at each frame. The "flashsdl.c" should be your skeleton for your own C/C++ project. Just move the initializing code into the setup() function and refactor the mainloop into the tick() method. You can also make use of those already declared variables in that file, such as using "TMPFLASH_screen" as your main screen buffer.

2. Displaying BMP Images in Flash SDL
The code in this section is based on Lazy Foo' tutorial: http://lazyfoo.net/SDL_tutorials/lesson01/index2.php.

(Flash) SDL has build-in BMP image support. To let the Flash SDL load a BMP image, we need to modify some AS3 code:
in "\src\sdl\LibSDL.as"
internal var cLoader:CLibInit;
To
public var cLoader:CLibInit;
Then embed the image file and supply it to Alchemy - related AS code in modified "flashsdl.as":
[Embed(source="../hello.bmp",mimeType="application/octet-stream")]
public static var hellobmpClass:Class;
...
this.libSDL = new LibSDL();
this.libSDL.cLoader.supplyFile("hello.bmp", new hellobmpClass());
...
Now you can load the image "hello.bmp" form C side normally. Please find the full C side code for loading and displaying the image in my source code package for this tutorial.
After adding the image loading and displaying code on the C side, recompile you will see something like this:


3. Playing Sound in Flash SDL
The Flash SDL does not have sound support yet on the C side.There is a fork on github which tried to add sound support, https://github.com/kompjoefriek/flashsdl, but it is not usable yet and there is no updates for a long time. Noticing that most SDL applications are using SDL_mixer library instead of SDL_sound, I think a much wiser way is to use Flash's build in sound support instead of porting both libraries. You can also find my simple solution for playing "mp3" files in source code package (ALC_GE2D_PlaySound.c, flashSDL_sound.c), I just wrote some simple function calls to let the C function call the AS3 method for playing mp3.

4. True Type Font support and SDL_ttf in Flash SDL
Thanks to Emcmanus again, who has already ported the FreeType library to Flash, we can use the SDL_ttf library in Flash SDL to display true type font texts.

First, goto https://github.com/emcmanus/FlashFreeType, download the compiled lib in the repository zip,
Copy "freetype.l.bc" into "D:\alchemy-cygwin-v0.5a\usr\local\lib",
and
Copy all header files in ".\src\c\freetype-2.3.9\include" to "D:\alchemy-cygwin-v0.5a\usr\local\include".

Then download the source file of SDL_ttf, form http://www.libsdl.org/projects/SDL_ttf/, put SDL_ttf.h SDL_ttf.c into the same folder of "flashSDL_sound_font.c", and include both files in "flashSDL_sound_font.c" using
#include "SDL_ttf.h"
#include "SDL_ttf.c"
After added some testing code for displaying text in "flashSDL_sound_font.c"'s setup method (please find the related C code in this tutorial's source code package, which are all based on http://lazyfoo.net/SDL_tutorials/lesson07/index.php), build the swc using some command like:
g++ flashSDL_sound_font.cpp -DFLASH -Ifreetype -Isdl -lfreetype -lSDL -swc -O3 -o libSDL.swc
Also embed and supply the font file to C:
[Embed(source="../lazy.ttf",mimeType="application/octet-stream")]
public static var fontClass:Class;
...
this.libSDL.cLoader.supplyFile("lazy.ttf", new fontClass());
Recompile the swf, you will see the font displaying successfully:


Note: when using g++ to build the swc instead of gcc, you may need to edit some function declarations from "flashSDL_sound_font.c" to:
AS3_Val setup(void *data, AS3_Val args);//need arguments here!
AS3_Val quitApplication(void *data, AS3_Val args);//need arguments here!
AS3_Val tick(void *data, AS3_Val args);//need arguments here!
AS3_Val FLASH_getDisplayPointer(void *data, AS3_Val args);//need arguments here!

5. Fix the Arrow Keys Bug in Flash SDL
You may find that arrow key event will be ignored if you're using the precompiled "SDL.l.bc" provided by the author. This is very inconvenient since many game applications are heavily relying on arrow keys. To add arrow key support, find the "SDL_flashevents.c" file in "\emcmanus-flashsdl-04ce063\sdl\src\video\flash\" folder, goto the "FLASH_InitOSKeymap" function and add four lines for mapping arrow key events at the end of that function as below:
void FLASH_InitOSKeymap(_THIS)
{
...
keymap[SCANCODE_APOSTROPHE] = SDLK_QUOTE;

keymap[38] = SDLK_UP;
keymap[40] = SDLK_DOWN;
keymap[37] = SDLK_LEFT;
keymap[39] = SDLK_RIGHT;
}
Recompile the "SDL.l.bc"
In sdl/:
make -f Makefile.flash clean all;
cd F:/alchemy/emcmanus-flashsdl-04ce063/sdl
Copy the compiled "SDL.l.bc" (F:\alchemy\emcmanus-flashsdl-04ce063\sdl) into "D:\alchemy-cygwin-v0.5a\usr\local\lib" and replace the old one. You can also find the updated "SDL.l.bc" in my source code package. If you don't want to recompile the whole Flash SDL library, simply copy mine and replace the old one.
After that, recompile the swc and your Flash project, arrow keys should work then.

6. Fix the supplyFile bug in Alchemy
This bug had been described by me here: http://forums.adobe.com/thread/942556. The usual problem brought by the bug is that game saves can only be loaded once (if you use fopen on the C side) in each game session. You always need to restart the flash player (and hence your game) to load game saves if you have used the first opportunity. The bug is caused by that using "supplyFile" twice with the same file path won't work if you ever used "fopen" between the two "supplyFile"s.

To fix this bug, you need to modify the generated .as file by Alchemy as described in my old post:
http://bruce-lab.blogspot.sg/2011/01/adobe-alchemy-hacks-compile-as-source.html

First download the fixed version of "alc-asc" here: http://flaswf.googlecode.com/svn/trunk/QuickAlchemy/Hack/SWC/, put it into your "alchemy/achacks" folder, and search & replace the string "F:/alchemy/" to your Alchemy path (mine is "D:/alchemy-cygwin-v0.5a/").
When building the swc using Alchemy, keep the "XXXX.achacks.as" file, then open it, commentize the line "if(!res)" in the function "fetch", so the patched function should look like this:
private function fetch(path:String):Object
{
var res:Object = statCache[path];

//if(!res)
{
var gf:ByteArray = gfiles[path];
...
Finally, recompile the ".as" file into the swc.
alc-asc 6956.achacks.as libSDL.swc
With this patched swc, "supplyFile" will work well.

Links:
1. The source code package for this tutorial:
https://flaswf.googlecode.com/svn/trunk/flaswfblog/Tutorials/FlashSDL

2. Two example SDL games ported to Flash (with full source code):

Infinite Balls:
Demo: https://en.mochimedia.com/community/games/Bruce_Jawn/infinite-balls
Source Code: https://flaswf.googlecode.com/svn/trunk/Games/InfiniteBalls

Sword Girl:
Demo: https://en.mochimedia.com/community/games/Bruce_Jawn/_v52410
Source Code: https://flaswf.googlecode.com/svn/trunk/Games/GirlSwordFlash

3. Array @ARGV missing the @ in argument 1 of shift() at problem
http://forums.adobe.com/message/3892045

4. Flash SDL FlasCC version:
https://github.com/alexmac/alcextra 

Friday, August 3, 2012

Jump To Pass - New 2.5D Game Powered by Z-Ground Engine Released!


OBJECTIVE:
Navigate the bouncing ball to pass over the road obstacles within the 60 seconds time limit. There is the no way backward.

Use less time to get high scores, this game has infinite number of randomly generated levels.

TIPS:
The camera view is "First Person", so the ball's on ground position is exactly the edge of the screen. Keep looking forward, make sure you won't fail on your next jump before pushing the ball. Use mouse control only is recommended.

INSTRUCTIONS:
Left Mouse Button Down (Hold) or Up Arrow Key to Push the Ball Forward
Move Mouse Left/Right or Left/Right Arrow Keys to Roll the Ball Left/Right
Right Click to Turn On/Off Bouncing/Menu Sound
Enter Key to Pause Game

About:
Z-Ground is not dead!? 4 years after the first announcement of Z-Ground, the first game powered by the engine, with full source code, is finally released!

Z-Ground is the 2.5D Mode-7 engine I've been working on since 2008. At that time, there is no hardware acceleration, and flash 3D is not so common while many old school 3D tricks, such as mode-7, ray-casting, are popular among flash developers. I created Z-Ground engine for exploring these pseudo 3D technologies. But soon, lots of things changed rapidly in the flash world as you may know. Papervision, Sandy and Away3D came out, Flash 10 introduced some simple 3D API and finally there is Stage3D. Z-Ground is out-dated and actually I've stopped developing it much earlier than those big events because I found a much more exciting direction - voxel, that's why there are only a "prerelease" version and some demos released since 2008.

There is no "updates" of this release. The engine is almost the same as it was in 2008, just a little better than the prerelease version. The difference is the prerelease version used masks for ground slices, as many old mode-7 engines in flash 5-8 did, while the new one uses bitmapdata fill. So the new one should be much faster than the previous version.

The game "Jump To Pass" is firstly made for Kizi FGL Developer Competition - making a game in 48 hours, with theme "Passage" and "60 second (or less) time trial", "Mouse Control Only" as game rules. Then slighted modified for 2012 Mochi Summer Contest.

As I said, I've stopped to maintenance the engine - it is still slow and with limited function. There is no point to upgrade it for competing with modern flash 3D engines. I used it for making the game just for commemorating the first engine I worked on. The source package contains full source code of the game "Jump To Pass", as well as the engine's rendering core (but not everything, the full engine in 2008 is already much "advanced" than this, with sprite rendering, walls, ceiling, lighting, water, terrain, real 3D, simple physics and even a map editor. I may clean them up and release these functions later).

Download the source code: 
https://flaswf.googlecode.com/svn/trunk/Games/JumpToPass/JTP.zip
Warning: The source code of the game is very messy, because it is a game made within 48 hours.

Thursday, August 2, 2012

Haxenme Installation Notes

1. Download the standalone installation package NME-3.4.0-Windows.exe at
http://www.haxenme.org/download/
(Haxe [2.10], Neko [1.8.2], NME [3.4.0], HXCPP [2.10], Actuate [1.43], SWF [1.13])

2. Click and run to install.
(2013/3/15:
Tips: For updating NME from an older version, the simplest way is to download the new setup package, and reinstall. Uncheck the things that are already newest here, e.g., Haxe, Neko. Then select the same folder of the old installation.
http://www.nme.io/community/forums/feature-requests/eficient-way-to-upgrade-nme/)


3. Setup HaXe:
Go to D:\Motion-Twin\haxe, run haxesetup.exe


Done! Now let's test it.

4. Go to cmd:
haxe

nme


5. Now download the sample file at
http://www.joshuagranick.com/blog/2012/02/22/nme-game-example-pirate-pig/
to test.
Unzip the source code "jgranick-PiratePig-9deb597.zip" to D:\TEST_PROJECTS\jgranick-PiratePig-9deb597.
cmd commands to build the swf:
cd D:\TEST_PROJECTS\jgranick-PiratePig-9deb597
nme test "Pirate Pig.nmml" flash


and to build html:nme test project.nmml html5


6. Use Flashdevelop for nme projects. (You should install Flashdevelop at http://www.flashdevelop.org/ first)
Open Flashdevelop and configure haxe path:

Open "Pirate Pig.hxproj" and build the project:


7. To use haxecpp target windows, you need to install VC++ (nme setup windows) at
http://www.microsoft.com/visualstudio/en-us/products/2010-editions/visual-cpp-express first.
After that
cd D:\TEST_PROJECTS\jgranick-PiratePig-9deb597
nme test "Pirate Pig.nmml" cpp

Alchemy v0.5a Installation Notes

Got a new notebook, so I will post some notes for future reference. Here is the one for Adobe Alchemy,

Environment: Windows 7.
Official Instructions:
http://labs.adobe.com/wiki/index.php/Alchemy:Documentation:Getting_Started#Windows

1. Go to http://cygwin.com/install.html, download the "setup.exe" and install cygwin (to C:\cygwin) with the following packages:
zip (archive), gcc-g++, make (devel), perl.


2. Downloaded alchemy package at http://labs.adobe.com/downloads/alchemy.html,
(Backup: https://docs.google.com/folder/d/0B5V2PrQ8xX_EN2NCWHkySGlMclE/edit)
unzip it to D:\alchemy-cygwin-v0.5a.

3. Open Cygwin Terminal, input the following commands:
cd D:\alchemy-cygwin-v0.5a
./config


4. Test alchemy with the commands to build the sample files:
source /cygdrive/d/alchemy-cygwin-v0.5a/alchemy-setup
alc-on
cd D:/alchemy-cygwin-v0.5a/samples/HelloFlash
gcc HelloFlash.c -O3 -Wall -swf -o HelloFlash.swf

and

cd D:/alchemy-cygwin-v0.5a/samples/stringecho
gcc stringecho.c -O3 -Wall -swc -o stringecho.swc

It works and successfully generated the swf and swc files!

Thursday, June 14, 2012

Destructor - Voxel based FPS game power by Bengine for the 7DFPS!


Voxel based First Person Shooter created in Flash.

OBJECTIVE:
Destroy the world as much as you can! Less voxels remaining means higher score rank.
No enemies, no life bars, no bullets & time limits, just enjoy the shooting in the fully destructible environment. Be a Destructor!

TIPS:
Use "portals" (holes) on the ground to go to higher place.

INSTRUCTIONS:
Aim/Shoot: Left Mouse
Move/View: WSAD QEZX/Arrow Keys
Jump: Space
Pause Game: Enter (You can submit your scores in the pause menu.)

Download the SWF: https://flaswf.googlecode.com/svn/trunk/Games/Destructor/Destructor.swf

I've wanted to create a FPS game using Bengine since two years ago when I released the game "Bengine Race". Bengine was designed for FPS games but there was only one experimental "Racing" game made using it. The fact is that I didn't drop Bengine, I'm still developing on it silently when I have time. There were several new versions of the engine I used for the game "Bengine Race". I named them as "PBengine", "ASPBengine" and finally "ReBengine". In ASPBengine, I ported many Bengine's C code to AS3, such as the code for physics and controls, only leave the rendering core in C for speed. This game "Destructor" uses ReBengine, where "Re" stands for "Revert" instead of "Revision". For a long time I tried to optimize the engine for maximum speed at the cost of the graphics' quality. And when ASPBengine can run at above 60 FPS, I realized that the aliasing is intolerable. The low resolution of the original "Bengine" is already intolerable to many players, so I revert the rendering algorithm to the original "Bengine" and that's what "ReBengine" means.

ReBengine should be a litter faster than the original Bengine, though they use similar rendering algorithm. One difference is that ReBengine has more AS3, so it is much easier to compile and test. And the milestone is that ReBengine has a fully scriptable in-game voxel world editor, which is still under development.

Thanks to 7DFPS, it gives me a good motivation to make such a simple experimental FPS game. 7 days are enough for a good game, if you can work full time on it. It's a pity that I don't have much free time here to make my game complete. When I started, the rendering engine with simple physics was almost done, but there was still much to do for a game engine. I spent several days' free time and finished the game framework as well as the shooting prototype, and integrated them with Bengine. Running out of time for map design, I borrowed the map from Bengine Race. Hope you will enjoy it.

Credits: (for whatever helped to develop this game)
FlashDevelop
Adobe Alchemy
GIMP
Inkscape
http://cooltext.com
http://www.flamingtext.com
http://7dfps.org
Boostworthy Animation System
Mochi Service

And ...

Saturday, June 2, 2012

Source Code of the Game - Wolf5k Flash


Description: A fast paced First Person Shooter. Classic FPS game Wolfenstein3D like first pernson shooting game.
Remake of Wolf5K in Flash.
Objective: Eliminate all enemies in the level to go to next level.
This game has infinite number of levels.
Enter key to view time, level, enemies left, total kills, life and score.
Instructions:
Mouse Move: Move
W/up: move forward
S/down: move back
Q/left: turn left
E/right: turn right
A/Z: strafe left
D/X: strafe right
----------
Space/Right Click: shoot
Enter: pause game/view game status
M: show/hide map

Source Code: https://flaswf.googlecode.com/svn/trunk/Games/Wolf5kFlash/

Special Thanks to:
http://code.dawnofthegeeks.com/2009/05/05/c-lesson-37-wolf5k-making-it-better-part-1/
http://minimalcomps.com/

Sunday, April 29, 2012

Jquery Turn on/off Lights Effect

I found the script to create simple turn on/off lights effect for web pages here: http://www.emanueleferonato.com/2009/10/12/jquery-powered-lights-off-effect/
It use jquery to achieve the effect. The idea is to create a css as the light which covers the page.
However, the original script has several problems:
1. The light can only cover the screen, not the full page.
2. Links and texts are not selectable.
3. Embeded swf will be covered.

The solution to the first problem: http://stackoverflow.com/questions/2852276/make-div-overlay-entire-page-not-just-viewport
For the second, there is a fix in the comments below there. And the third one, for swf, I defined a new css which will not be covered (higher z-index) and use jquery to change its background to black when turning off the lights.

The final enhanced version:
Demo
Source Code
(Scroll down to the bottom of page, click Lights off/Soft lights/Lights on to see the effect, right click to view source.)

Links:
http://jquery.com/

Thursday, April 26, 2012

Free SWF Encryptor, Obfuscator and Protectors!

1. Makc3d's open source SWF obfuscator written in AS3 (WTFPLv2):
http://makc3d.wordpress.com/2010/02/09/open-source-swf-obfuscator/
http://wonderfl.net/c/6WDD/
http://makc3d.wordpress.com/2013/01/27/free-swf-obfuscator-update/

2. SOB: Open Source SWF Obfuscator.
Can replace the strings in the SWF/ABC string table with random strings.
Source Code (C): https://github.com/badsector/sob

3. Action Script 3 Obfuscator: Python script that takes in a single .as file and makes it hard to decipher.
https://github.com/shapedbyregret/actionscript-3-obfuscator
http://jwopitz.wordpress.com/2012/02/01/as3-code-obfuscator

4. SWF File Obfuscator:
Source Code: http://sourceforge.net/projects/flmobf/

5. SWFLOCK: Online service to do domain lock, trial period and password protection, now free.
http://www.swflock.com/

6. Flash Protection Gold: Packing, domain locking and can add preloaders for your swf, now free.
http://www.avimpeg.net/flash_protection.htm

7. Flash Free Protection: A free tool that protect your flash files.
http://flashfreeprotection.blogspot.com/

8. OBFU: A Flash Action Script obfuscator:
http://www.opaque.net/~dave/obfu/
This software is really outdated, but its source code (C, GPL) may be useful. The junk opcodes insertion method is the classical way for cheating decompilers.

9. Actionscript Obfuscator: Flasm based, for AS1,2 only.
http://www.monokai.nl/blog/2006/08/02/actionscript-obfuscator/

10. Actionscript Source Obfuscator:
Obfuscates multiple Actionscript 3.0 source files by remaning all that can be renamed.
https://github.com/Sandremss/Actionscript-Source-Obfuscator

11. Flasturbate:
A open source SWF obfuscator based on RABCDAsm.
https://github.com/Teesquared/flasturbate

Links:

1. Способы «защиты» flash-приложений
(Ways to «protect» flash-applications, in Russian.
Try Google Translate!)
http://habrahabr.ru/blogs/Flash_Platform/110686/

2. Pack a SWF: http://active.tutsplus.com/tutorials/workflow/protect-your-flash-files-from-decompilers-by-using-encryption/

3. Junk instructions insertion method explained: http://www.gotoandplay.it/_articles/2004/04/swfProtection.php

4. [Tutorial] Applying ROT128 Encryption On Embedded/Module SWFs:
http://www.ghostwire.com/blog/archives/as3-applying-rot128-encryption-on-embeddedmodule-swfs/

5. [Tutorial] Domain Locking SWFs and Preventing SWFs From Running Locally:
http://www.ghostwire.com/blog/archives/as3-domain-locking-swfs/
http://www.ghostwire.com/blog/archives/as3-preventing-swfs-from-running-locally/
FusionLock – Simple SiteLock AS3 package:
http://profusiongames.com/blog/fusionlock/

6. Anti-Cheat Methods
Keep the CheateEngine out of your Flash Online Games:
http://danielbunte.de/2012/02/16/keep-the-cheateengine-out-of-your-flash-online-games/
Secure Your SWF Files Against the Cheat Engine:
http://voices.yahoo.com/secure-swf-files-against-cheat-engine-using-2513602.html?cat=15

https://www.mochimedia.com/community/forum/topic/anti-cheat-methods-for-mochiads-games
http://www.kongregate.com/forums/4/topics/25698

7. An Introduction to SWF Obfuscation:
http://bmanatee.blogspot.com/2013/07/an-introduction-to-swf-obfuscation.html

8. Advanced protection of Adobe AIR content:
http://gamespoweredby.com/blog/2014/09/advanced-protection-of-adobe-air-content-desktop-only/

9. More:
https://www.fgl.com/blog/2010/11/how-to-protect-your-game-from-being-rebranded/
http://www.playgb.com/page/how-to-avoid-external-link-blocking?c=17

Sunday, March 25, 2012

Friday, March 23, 2012

The List of Open Source MineCrafts

MineCraft will be open source someday in the future (http://www.minecraft.net/about.jsp):
"Once sales start dying and a minimum time has passed, I will release the game source code as some kind of open source. I'm not very happy with the draconian nature of (L)GPL, nor do I believe the other licenses have much merit other than to boost the egos of the original authors, so I might just possibly release it all as public domain. "

But for now, enjoy this list of open source MineCraft alternatives!

1. Manicdigger
http://sourceforge.net/projects/manicdigger/
http://manicdigger.sourceforge.net/news/
"Manic Digger is a public domain 3d block-building game similar to Minecraft."
Features: Infinite world, Rails, Crafting, Shadows, Multiplayer
License: Public Domain
Language: C#


2. Opencraft: http://opencraft.sourceforge.net
OpenCraft is an alternative Minecraft server, providing more advanced features than the official distribution.
Features: Scripting, griefing preventation
License: BSD
Language: Java


3. Minedroid: http://code.google.com/p/minedroid/
Features: Work with a touchscreen interface
License: New BSD
Language: Java


4. Infiniminer: http://thesiteformerlyknownas.zachtronicsindustries.com/?p=713
https://github.com/krispykrem/Infiniminer
http://code.google.com/p/infiniminer/
Features: multiplayer
License: MIT
Language: C#


5. Minetest-c55:
http://celeron.55.lt/~celeron55/minetest/index.php
Features: Survival mode, creative mode, multiplayer, dynamic lighting, almost infinite world, Infinite map generator
License: GPL
Language: C++


6. TechCraft: http://techcraft.codeplex.com/
Features: Minecraft style terrain engine
License: Ms-PL
Language: C#


7. ArdorCraft: http://ardorlabs.se/ArdorCraft/
https://code.google.com/p/ardorcraft-api-examples/
https://github.com/rherlitz/ArdorCraft
Features: API to build new types of blockworld games
License: MIT
Language: Java


8. Terasology (Blockmania):
http://blog.movingblocks.net/blockmania/
https://github.com/MovingBlocks/Terasology
Features: Procedural terrain generation, efficient rendering
License: Apache 2.0
Language: Java


Finally, this one is not open source, but you can't miss it!
http://ace-spades.com/ http://buildandshoot.com/(based on voxlap engine)
"It's the best bits of Minecraft crossed with the fast-paced shooter gameplay of Team Fortress."
Features: Dynamic lighting, 32 players battling, CTF or Territory Control game modes
License: Closed Source
Language: C/C++


Ace of Spades is now a commercial game, but we have
 
9. Iceball: Open Source Version of Ace of Spades!
https://github.com/iamgreaser/buldthensnip
http://buildandshoot.com/viewtopic.php?f=5&t=60
http://iceballga.me/index.php


10. Minecraft in Blender: Minecraft like in the Blender Game Engine.
http://www.youtube.com/watch?v=bCJa5H-oOxc&feature=player_embedded
www.blendernation.com/2013/03/19/minecraft-in-blender/
 

More:

Crafty (C++)

http://www.sea-of-memes.com/downloads/Crafty.html

Craft (C)
https://github.com/fogleman/Craft

Voxel.js (JavaScript, BSD)

http://voxeljs.com/

Voxeliq (C#)
https://github.com/raistlinthewiz/voxeliq

Blackvoxel (C/C++, GNU GPL V3)
http://blackvoxel.com 

CraftSaga (Unity, C++)
https://github.com/komorra/CraftSaga  

Links:
AIR-based Minecraft Map Viewer (with source code):
http://www.joranderaaff.nl/2011/10/minecraft-map-viewer/

Minecraft like games in flash:
http://kube.en.muxxu.com/
http://galaxy55.com/

A minecraft level render in flash:
http://liquify.eu/flash/MCExplorer
http://www.minecraftforum.net/viewtopic.php?f=25&t=96591
Source Code of MCExplorer (open source minecraft map render/viewer in flash/as3):
https://bitbucket.org/SmilyOrg/mcexplorer/wiki/Home

Minecraft and WebGL:
http://metaphysicaldeveloper.wordpress.com/2011/12/20/implementing-minecraft-in-webgl/
https://www.shadertoy.com/view/MdlGz4

Minecraft4kAS: http://wonderfl.net/c/sqL5
Minecraft4kJS:
http://jsdo.it/notch/dB1E
http://jsfiddle.net/uzMPU/

Minecraft4k(Java):
http://www.mojang.com/notch/j4k/minecraft4k/
http://pastebin.com/XK4EExyg

Minicraft(update on 2013/11/15, html5 in 252 bytes with source code):
http://www.p01.org/releases/minicraft/

https://github.com/fogleman/Minecraft (Minecraft in 900 lines of Python)
https://github.com/boskee/Minecraft
https://www.slideshare.net/rdonkin/pyglet-and-minecraft-v1-1

Others:
http://www.octaforge.org/
http://sauerbraten.org/
http://www.sandboxgamemaker.com/

http://alternativeto.net/software/minecraft/
http://gameslikefinder.com/games-like-minecraft/(Thanks to Samuel Taylor)
https://bitbucket.org/volumesoffun/voxeliens (retro-style arcade shooter)

Simple Tutorial for using MochiAds with HaXeNME

HaXeNME (http://www.haxenme.org) is an open source, cross platform haxe lib for developing games using a Flash like api. Just try it if you don't know it. If you hope to write once and compile to flash/html5/cpp/ios..., HaXeNME should be your first choice. I never tried to use mochiads with haxenme, though I know it is totally possible. Since some one PMed me for this topic, I did a quick research and want to share it here as a reminder for future reference.

Note: this is not a detailed step-by-step tutorial for newbies, just a reminder. I assume you have some experience of developing with HaXeNME using FlashDevelop (http://www.flashdevelop.org). However, if you have problems, feel free to post it here below.

The general steps for using mochiads with HaXeNME:

1. Download mochi api source code and compile all the AS3 source files into a "mochi.swc", unzip the swc file, rename the "library.swf" to "mochi.swf".

2. Generate the haxe source files needed for compiling your NME project:

haxe.exe -swf mochi.swf --no-output -swf-lib mochi.swf --gen-hx-classes 
Copy the genetated "mochi" folder (in its "as3" subfolder you should find lots of haxe files, such as "MochiAd.hx", "MochiCoins.hx", ...) into your project's "src" folder.

3. Import the mochi apis in your haxe project's main class:
import mochi.as3.MochiAd;
import mochi.as3.MochiServices;
To show pregame ads, for example, using the following code, similar to AS3:
MochiServices.connect("60347b2977273733", root);
MochiAd.showPreGameAd( { id:"60347b2977273733", res:"640x580", clip: root} );

4. Edit your project's "application.nmml", add the following line to force the haxe compiler to link "mochi.swf":
<compilerflag name="-swf-lib yourpath/mochi.swf"/>
Make sure the path to "mochi.swf" is correct.

5. Compile your project, that's all.
(Besides, you can use other swf libs with haxenme similarly.)

Full source code of my test project:
https://flaswf.googlecode.com/svn/trunk/flaswfblog/Tutorials/HaXeNME MochiAds Test
And the demo swf proving it works:
https://flaswf.googlecode.com/svn/trunk/flaswfblog/Tutorials/HaXeNME MochiAds Test/bin/flash/bin/HaXeNMEMochiAdsTest.swf 

Links: 
1. NMML File Format: http://www.haxenme.org/developers/documentation/nmml-project-files/
2. http://haxe.org/doc/start/flash#using-the-library
http://www.alexjeffery.org/programming/how-to-embed-a-swf-file-in-haxe/
http://wootfu.com/2011/08/using-mochiads-with-haxe/
http://brianin3d.wordpress.com/2010/08/04/kit-kat-toe-mochiads-with-haxe/

Sponsors